jimp介绍及参考
jimp的github仓库地址.
文档可参考文档
本文写作时以jimp v1.6.0版本为参考。
composite()方法介绍
写代码时用到jimp库,需要把二维码像素经过运算后叠加到背景图中, composite方法有非常丰富的参数,基本上可以满足大部分需求。 可以避免手动写循环处理像素。现在就来彻底搞清除这个方法的参数。
函数原型
composite(src, x, y, options){
        //something
}
其中只有src参数是必须的,其他都是可选参数。
x,y为目标图像的位置,options为叠加时的选项,我们将重点讨论这个options选项。
先举例说明如何使用:
import { Jimp } from "jimp";

const image = new Jimp({ width: 10, height: 10, color: 0xffffffff });
const image2 = new Jimp({ width: 3, height: 3, color: 0xff0000ff });

image.composite(image2, 3, 3);
上面例子会把image2叠加到image图片之上,image2位于image中(3,3)的位置。
options参数选项详解
options有三个字段:
{
    mode: BlendMode,
    opacityDest: number,
    opacitySource: number,
}
后两个字段中,opacityDest为目标图像的不透明度,取值范围为0-1,
opacitySource 为源图像的不透明度,取值范围为0-1,这两个参数比较直观,
我们重点分析第一个参数。
第一个参数mode的取值是个BlendMode枚举,这个枚举的元素可参考BlendMode文档, 也可以直接参考代码中注释,更加详细参考代码,
/**
 * How to blend two images together
 */
export enum BlendMode {
  /**
   * Composite the source image over the destination image.
   * This is the default value. It represents the most intuitive case, where shapes are painted on top of what is below, with transparent areas showing the destination layer.
   */
  SRC_OVER = "srcOver",
  /** Composite the source image under the destination image. */
  DST_OVER = "dstOver",
  /**
   * Multiply the color components of the source and destination images.
   * This can only result in the same or darker colors (multiplying by white, 1.0, results in no change; multiplying by black, 0.0, results in black).
   * When compositing two opaque images, this has similar effect to overlapping two transparencies on a projector.
   *
   * This mode is useful for coloring shadows.
   */
  MULTIPLY = "multiply",
  /**
   * The Add mode adds the color information of the base layers and the blending layer.
   * In digital terms, adding color increases the brightness.
   */
  ADD = "add",
  /**
   * Multiply the inverse of the components of the source and destination images, and inverse the result.
   * Inverting the components means that a fully saturated channel (opaque white) is treated as the value 0.0, and values normally treated as 0.0 (black, transparent) are treated as 1.0.
   * This is essentially the same as modulate blend mode, but with the values of the colors inverted before the multiplication and the result being inverted back before rendering.
   * This can only result in the same or lighter colors (multiplying by black, 1.0, results in no change; multiplying by white, 0.0, results in white). Similarly, in the alpha channel, it can only result in more opaque colors.
   * This has similar effect to two projectors displaying their images on the same screen simultaneously.
   */
  SCREEN = "screen",
  /**
   * Multiply the components of the source and destination images after adjusting them to favor the destination.
   * Specifically, if the destination value is smaller, this multiplies it with the source value, whereas is the source value is smaller, it multiplies the inverse of the source value with the inverse of the destination value, then inverts the result.
   * Inverting the components means that a fully saturated channel (opaque white) is treated as the value 0.0, and values normally treated as 0.0 (black, transparent) are treated as 1.0.
   *
   * The Overlay mode behaves like Screen mode in bright areas, and like Multiply mode in darker areas.
   * With this mode, the bright areas will look brighter and the dark areas will look darker.
   */
  OVERLAY = "overlay",
  /**
   * Composite the source and destination image by choosing the lowest value from each color channel.
   * The opacity of the output image is computed in the same way as for srcOver.
   */
  DARKEN = "darken",
  /**
   * Composite the source and destination image by choosing the highest value from each color channel.
   * The opacity of the output image is computed in the same way as for srcOver.
   */
  LIGHTEN = "lighten",
  /**
   * Multiply the components of the source and destination images after adjusting them to favor the source.
   * Specifically, if the source value is smaller, this multiplies it with the destination value, whereas is the destination value is smaller, it multiplies the inverse of the destination value with the inverse of the source value, then inverts the result.
   * Inverting the components means that a fully saturated channel (opaque white) is treated as the value 0.0, and values normally treated as 0.0 (black, transparent) are treated as 1.0.
   *
   * The effect of the Hard light mode depends on the density of the superimposed color. Using bright colors on the blending layer will create a brighter effect like the Screen modes, while dark colors will create darker colors like the Multiply mode.
   */
  HARD_LIGHT = "hardLight",
  /**
   * Subtract the smaller value from the bigger value for each channel.
   * Compositing black has no effect; compositing white inverts the colors of the other image.
   * The opacity of the output image is computed in the same way as for srcOver.
   * The effect is similar to exclusion but harsher.
   */
  DIFFERENCE = "difference",
  /**
   * Subtract double the product of the two images from the sum of the two images.
   * Compositing black has no effect; compositing white inverts the colors of the other image.
   * The opacity of the output image is computed in the same way as for srcOver.
   * The effect is similar to difference but softer.
   */
  EXCLUSION = "exclusion",
}
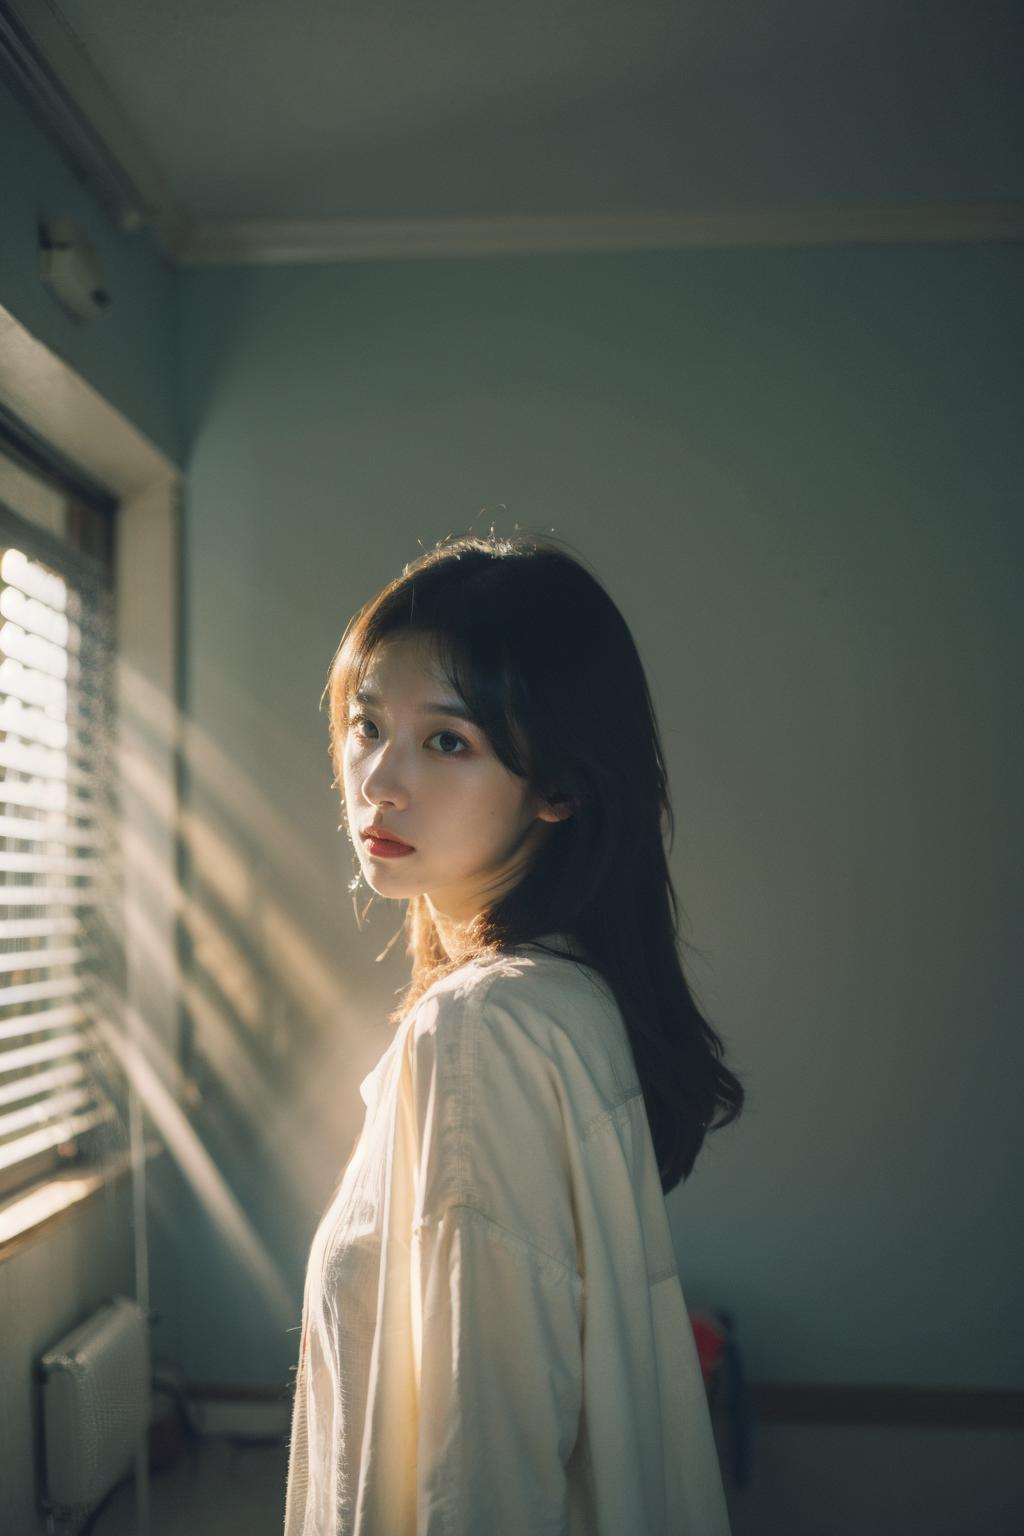
下面是对每个模式的详细介绍,其中使用的示例图片的原图如下:

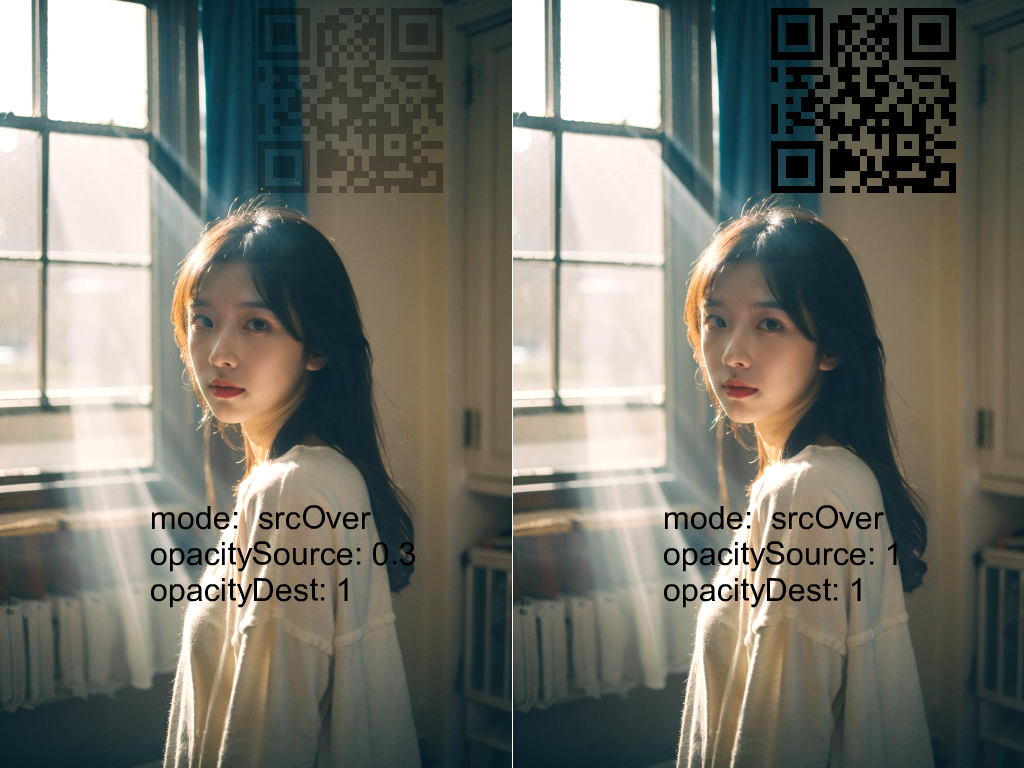
- SRC_OVER = “srcOver”
默认值,直接把源图像(src)覆盖到目标图像之上,这个是最常用最直观的模式。
支持源图像的半透明效果,如果源图像是半透明的,则可以透过这块半透明区域看到底下的目标图像。
以下是在背景图上使用SRC_OVER模式,注意透明度的影响:
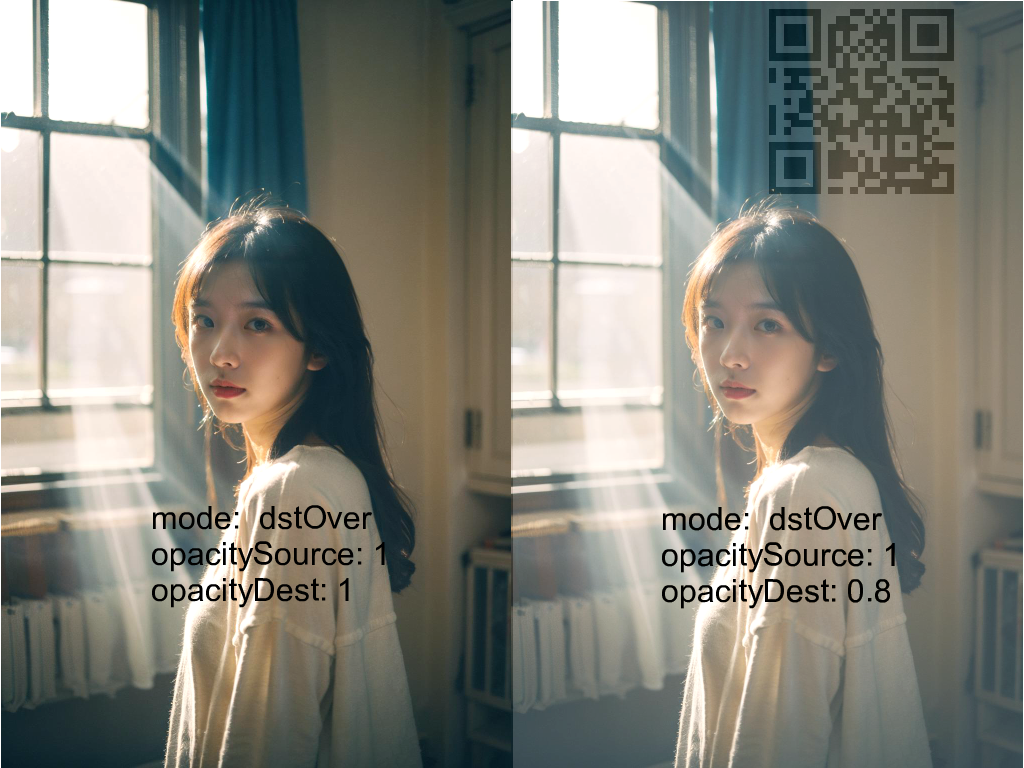
- DST_OVER = “dstOver”
将源图像叠加在目标图像之下,所以除非目标图像半透明,否则根本看不到源图像。
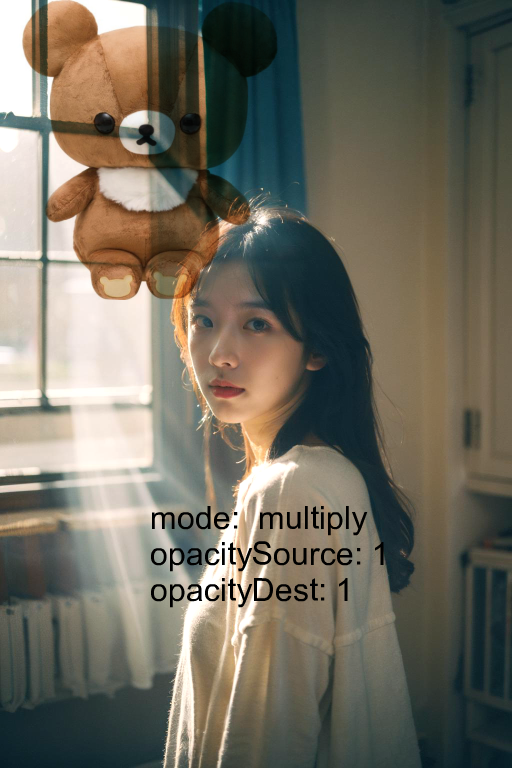
- MULTIPLY = “multiply”
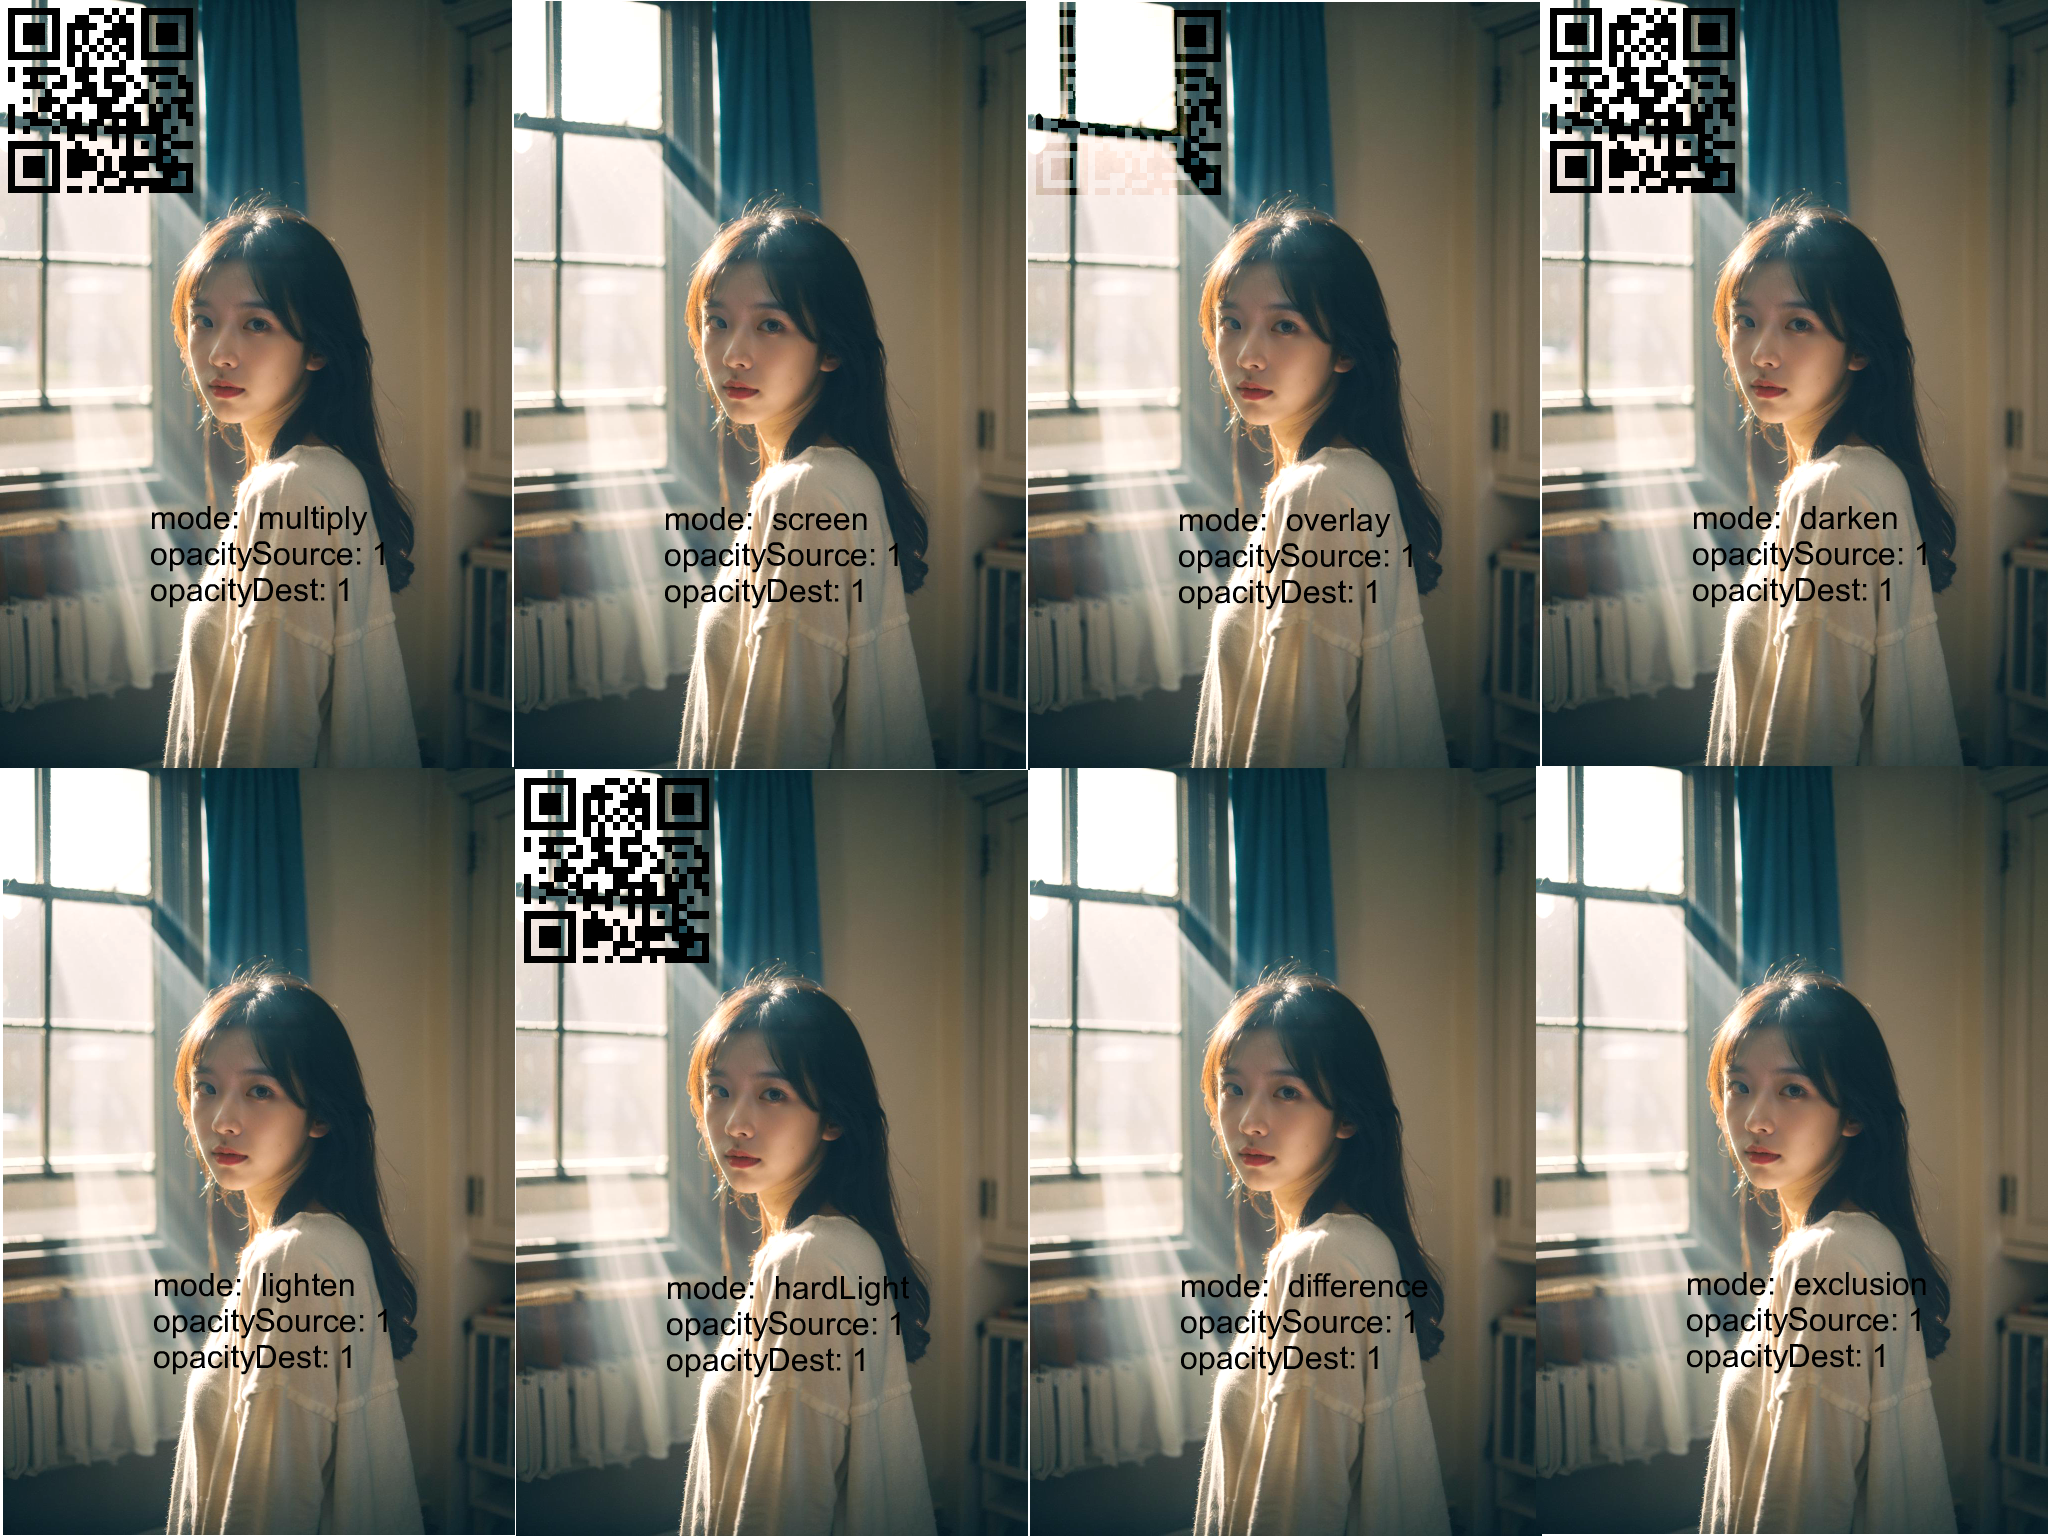
将源图像和目标图像的颜色分量相乘。这只会导致相同或更暗的颜色(与白色相乘,即1.0,不会改变;与黑色相乘,即0.0,会得到黑色)。 当合成两个不透明的图像时,效果类似于在投影仪上重叠两个透明片。 此模式用于给阴影上色。
- ADD = “add”
将两张图片颜色的RGB信息相加, 增加RGB数值实际上会增加亮度。
左边图像由于小熊背景是白色,RGB数值为255,所以再与背景相加会变为255, 有些较亮的部分由于相加后接近255也变得异常亮。右侧图像是添加的黑色二维码, 由于黑色的二维码本身RGB为0,所以相加后跟原图一样,黑色消失了。

- SCREEN = “screen”
将源图像和目标图像的分量反转后相乘,然后再将结果反转。 反转分量意味着一个完全饱和的通道(不透明的白色)被视为0.0,而通常视为0.0的值(黑色,透明)被视为1.0。 这实际上类似于调制混合模式,但颜色的值在相乘前被反转,并在渲染前将结果又反转回来。
这只能获得相同或更亮的颜色(与黑色相乘,即1.0,不会改变;与白色相乘,即0.0,会得到白色)。 类似地,在处理 alpha 通道时,结果只能是更不透明的颜色。 此效果类似于两个投影仪同时在同一个屏幕上显示图像。

- OVERLAY = “overlay”
将源图像和目标图像的分量相乘并进行调整以倾向于目标。 具体来说,如果目标值较小,则将其与源值相乘;如果源值较小,则将源值的反转与目标值的反转相乘,然后反转结果。 反转分量意味着一个完全饱和的通道(不透明的白色)被视为0.0,而通常视为0.0的值(黑色,透明)被视为1.0。
Overlay 模式在亮区域表现类似于 Screen 模式,而在暗区域表现类似于 Multiply 模式。 使用此模式,亮区会显得更亮,暗区则会显得更暗。

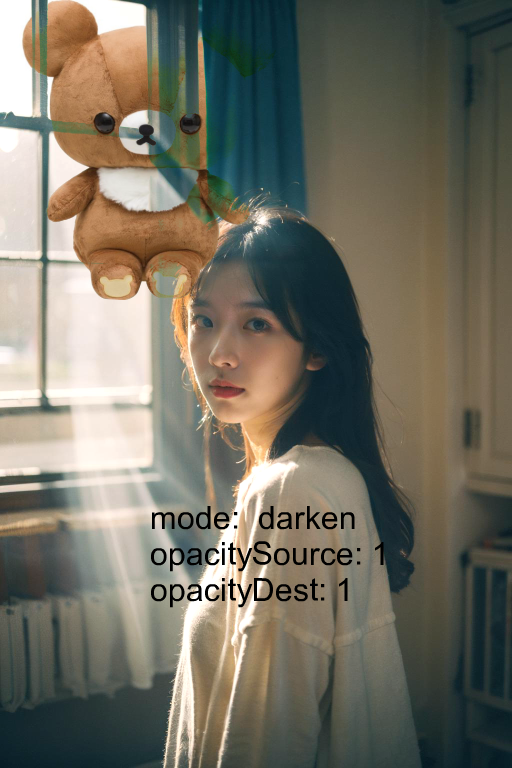
- DARKEN = “darken”
通过在每个颜色通道中选择最低值来合成源图像和目标图像
输出图像的不透明度计算方式与 srcOver 相同
- LIGHTEN = “lighten”
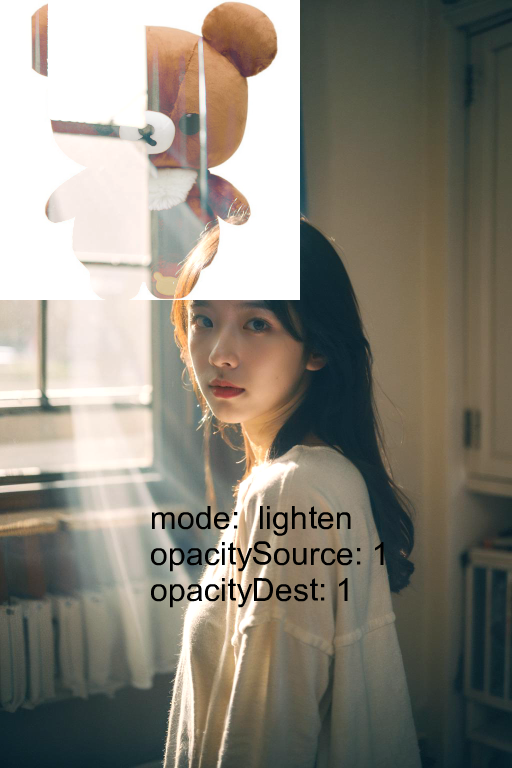
通过在每个颜色通道中选择最高值来合成源图像和目标图像。
输出图像的不透明度计算方式与 srcOver 相同。
- HARD_LIGHT = “hardLight”
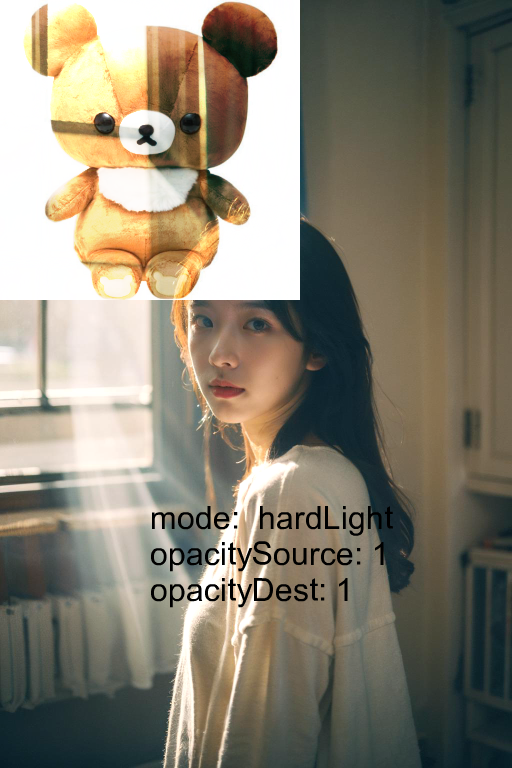
将源图像和目标图像的分量相乘并进行调整以倾向于源。 具体来说,如果源值较小,则将其与目标值相乘;如果目标值较小,则将目标值的反转与源值的反转相乘,然后反转结果。 反转分量意味着一个完全饱和的通道(不透明的白色)被视为0.0,而通常视为0.0的值(黑色,透明)被视为1.0。
Hard light 模式的效果取决于叠加颜色的密度。使用亮色会产生类似于 Screen 模式的效果,而暗色会产生类似于 Multiply 模式的效果。
- DIFFERENCE = “difference”
在每个通道中将较小的值从较大的值中减去。
合成黑色没有效果;合成白色会反转另一图像的颜色。
输出图像的不透明度计算方式与 srcOver 相同。
效果类似于 exclusion 但更加强烈。

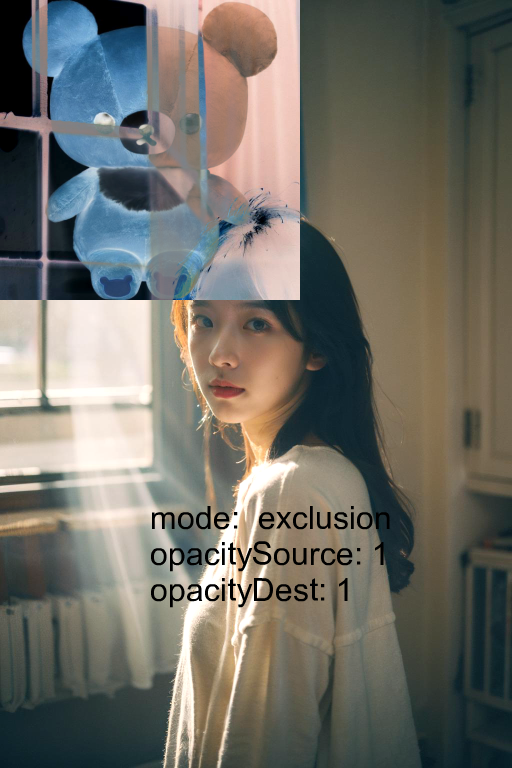
- EXCLUSION = “exclusion”
从两个图像的和中减去两倍的乘积。
合成黑色没有效果;合成白色会反转另一图像的颜色。
输出图像的不透明度计算方式与 srcOver 相同。
效果类似于 difference 但更加柔和。
我们把这几张图片放到一起,便于比较:
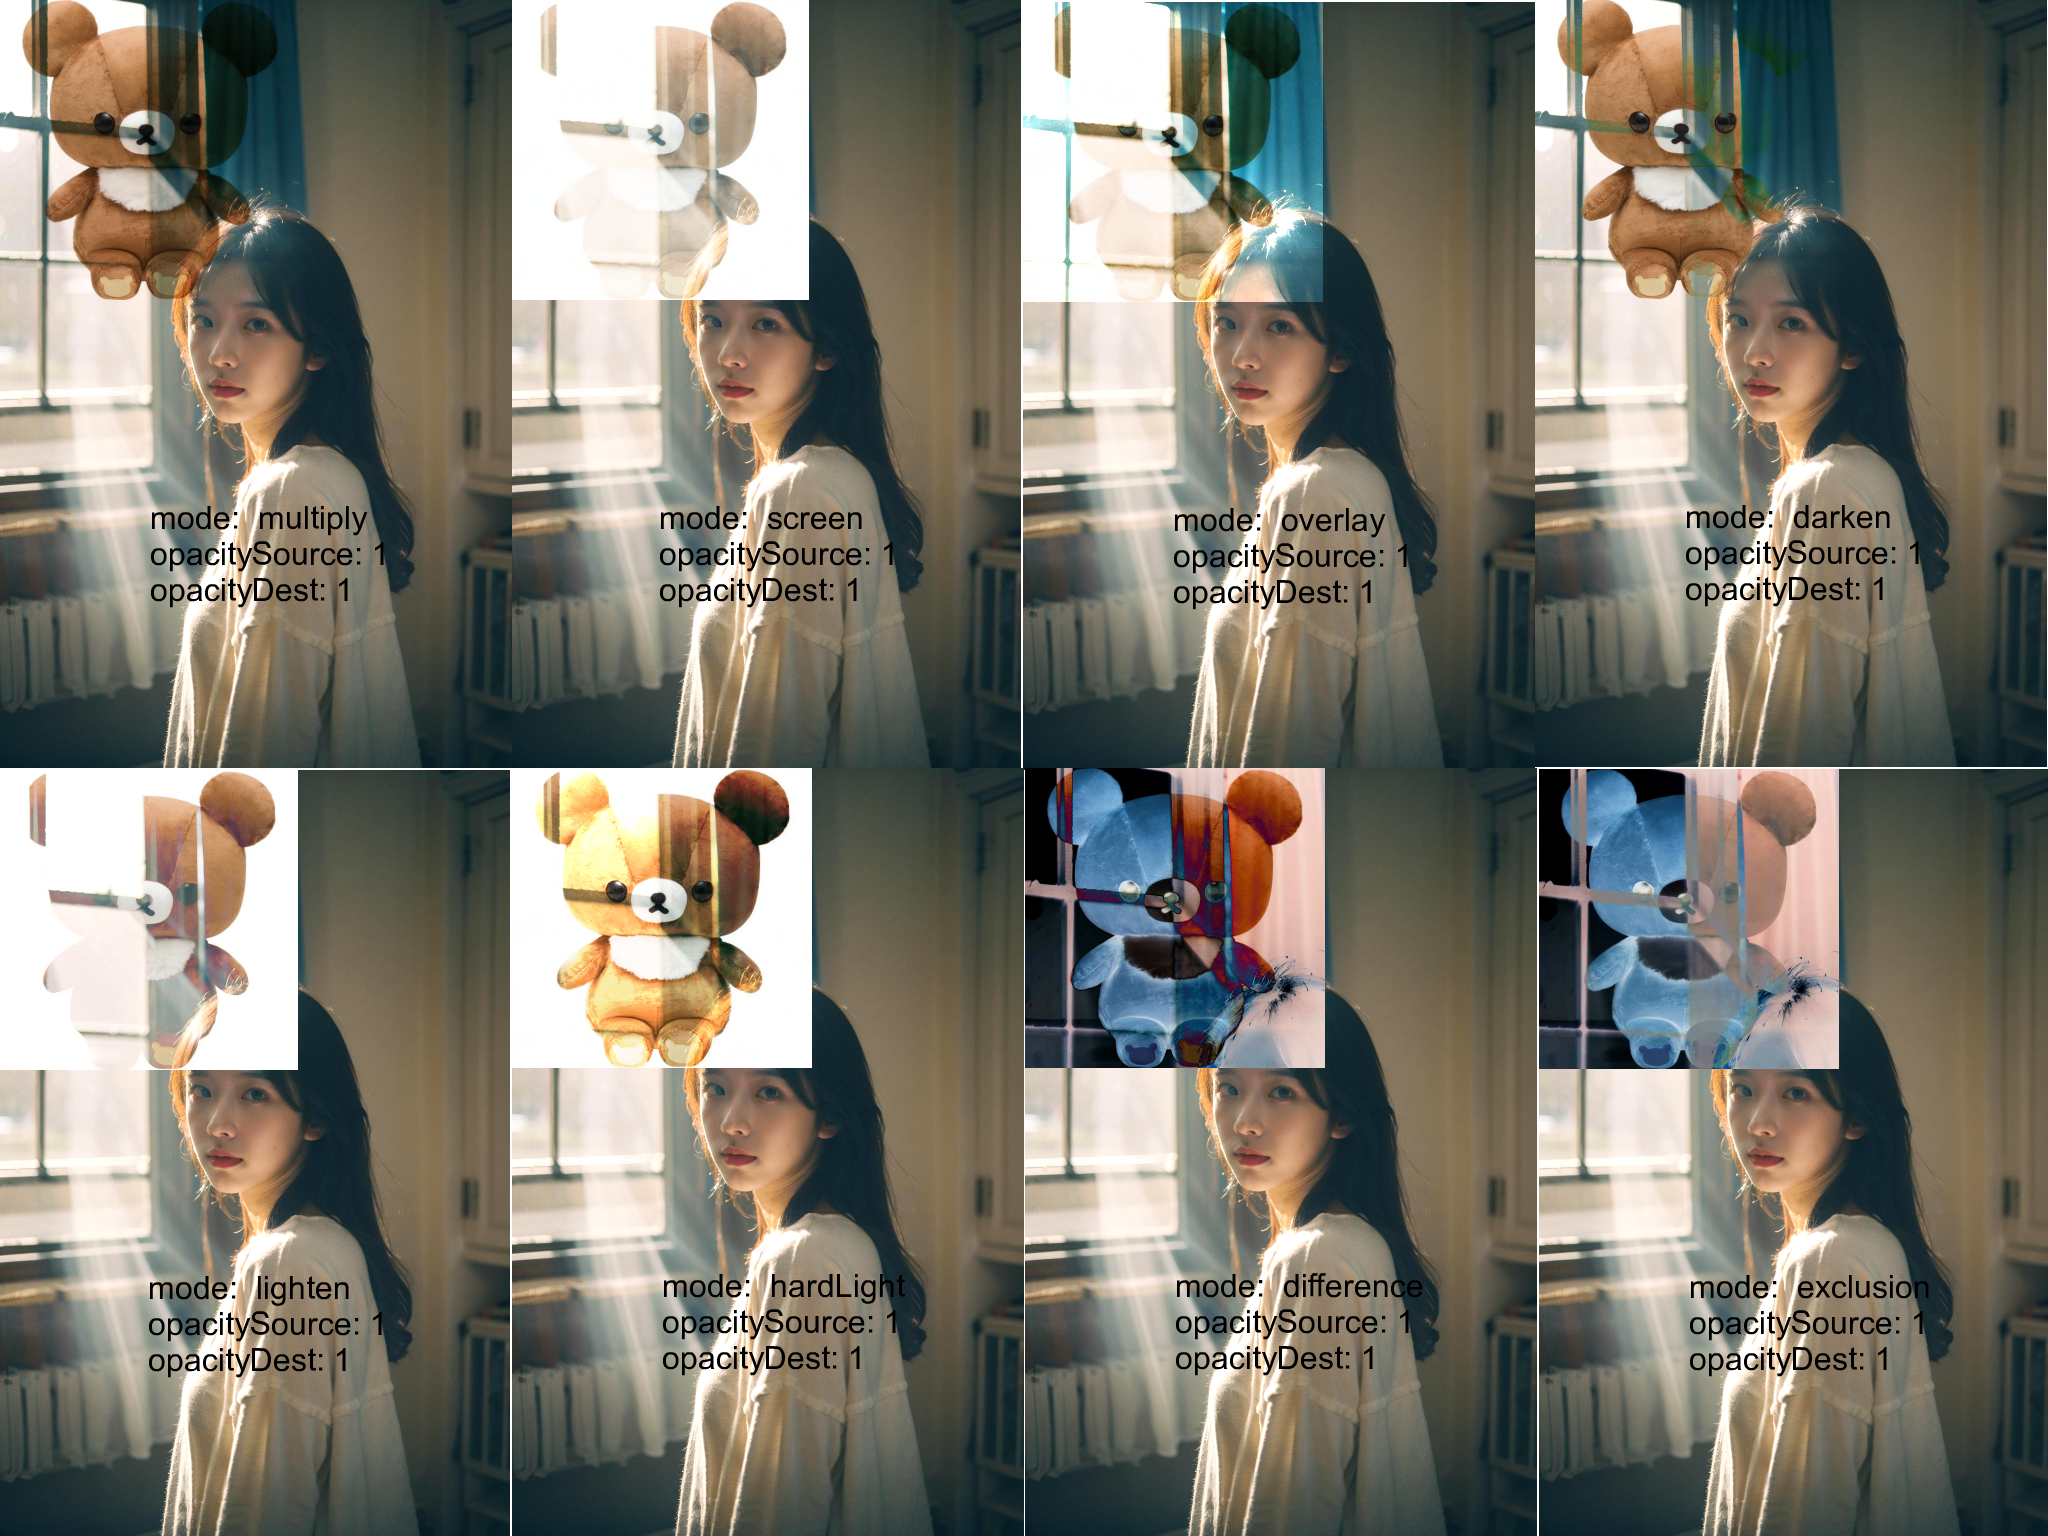
上面小熊图是白色背景,换一张透明背景的二维码看效果:
